יום חמישי, 24 באפריל 2014

How To Install Virtualbox On Ubuntu

Quick & easy Guide:

$ sudo add-apt-repository ppa:dreibh/ppa
$ sudo apt-get update
$ sudo apt-get install virtualbox

UNABLE TO LOGON VMWARE VCENTER APPLIANCE WITH ROOT

Symptoms

  • You are unable to log into the root account for the vCenter Server Appliance (vCSA).
  • The root account for the vCSA is locked.

Purpose

This article provides instructions on preventing the forced lockout of the root account and on unlocking a locked root account.

Cause

The 5.5 release of the vCenter Server Appliance (vCSA) enforces local account password expiration after 90 days by default. This policy locks out the root account when the password expiration date is reached.

Resolution

This behavior affects vCenter Server Appliance 5.5.

Prevent forced lockout when the root account is still active

If the root account is still accessible through the vCSA console or via the secure shell (SSH), you can prevent this issue from occurring by modifying the /etc/cron.daily/pass-expiration script.

To prevent the forced lockout when the root account is still active:

  1. Log in to the vCSA as the root user.
  2. Open the /etc/cron.daily/pass-expiration script in a text editor.
  3. Replace the commands at the bottom of the script to replace the forced lockout with a forced password change:

    1. Delete these commands:

      # disable the password if it's time and not already done.
      # don't rely on the pam account facility. prepend an x in the shadow file.
      if [ $TODAY -ge $DEADLINE ] && ! grep -q 'root:x' $SHADOW; then
         sed -e 's/^root:\(.*\)/root:x\1/' $SHADOW -i
      fi

    2. Enter these commands:

      # force a password change for root if we've reached the password expiration date.
      # pam.unix2 doesn't do this the way we would like, so we do this instead.
      if [ $TODAY -ge $DEADLINE ]; then
         chage –d 0 root
      fi
  4. Save and close the file.

Unlocking a locked out root account

If the root account is not accessible via the console, the secure shell, and the Virtual Appliance Management Interface (VAMI), the root account has been inactivated due to password expiration. To reactivate the root account, the vCSA must be rebooted and the kernel option modified in the GRUB bootloader to obtain a root shell.

To reactivate the root account:

  1. Reboot the vCSA using the vSphere Client.
  2. When the GRUB bootloader appears, press the spacebar to disable autoboot.


    Note: If the time between when you power on the virtual machine and when it exits the BIOS or EFI and launches the guest operating system is too short, you can adjust the delay. For more information, see Delay the Boot Sequence in the vSphere Client in the vSphere Single Host Management guide.
  3. Type p to access the appliance boot options.
  4. Enter the GRUB password.

    Note:
    • If the vCSA was deployed without editing the root password in the Virtual Appliance Management Interface (VAMI), the default GRUB password is vmware.
    • If the vCSA root password was reset using the VAMI, then the GRUB password is the password last set in the VAMI for the root account.
  5. Use the arrow keys to highlight VMware vCenter Server Appliance and type e to edit the boot commands.


  6. Scroll to the second line displaying the kernel boot parameters.


  7. Type e to edit the boot command.
  8. Append init=/bin/bash to the kernel boot options.


  9. Press Enter. The GRUB menu reappears.
  10. Type b to start the boot process. The system boots to a shell.
  11. Reset the root password by running the passwd root command.
  12. Restart the appliance by running the reboot command.
  13. Important: Follow the instructions in the Prevent forced lockout when the root account is still active section of this article to prevent future root account lock out and retain password expiration functionality.

Additional Information

The vCSA allows you to establish your own password expiration and warning email policies by using the Admin tab of the Virtual Appliance Management Interface (VAMI).


By default, the password expiration on the local root account in the vCSA is set to 90 days after the password has been changed. This typically occurs at first boot. If the password is not changed on installation, there is a 90-day period before expiration.

Email addresses configured in the Admin tab in the VAMI (https://IP_address:5480 or https://VAMI_host_name:5480) receive email notifications each day for seven days prior to password expiration. The email settings, such as relay SMTP server, are configured through the vSphere Client in the vCenter Server mail settings.  


יום ראשון, 20 באפריל 2014

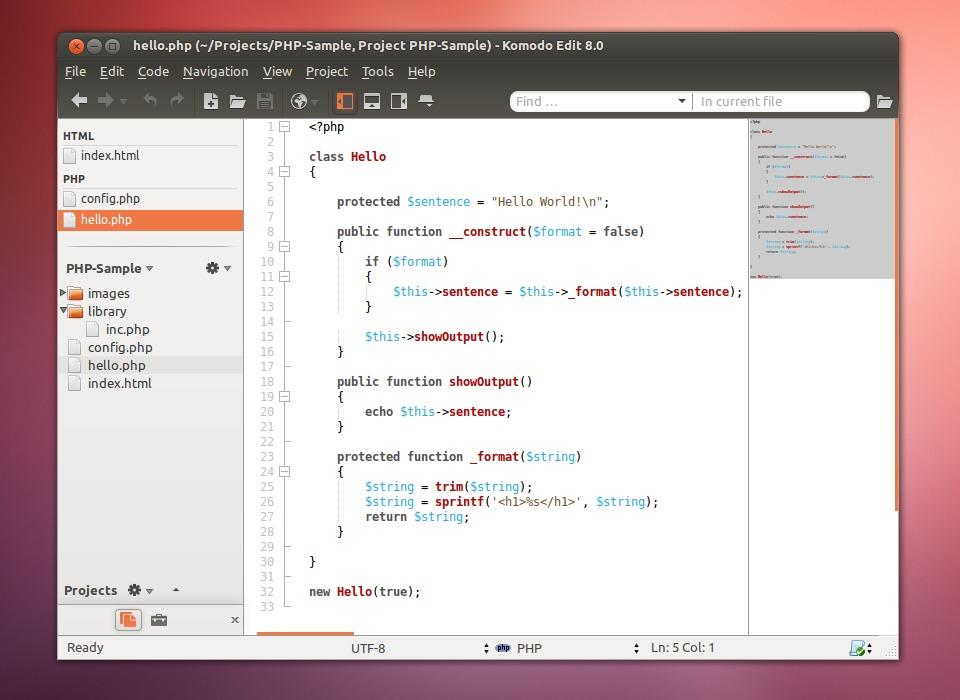
How to Install Komodo Edit on Ubuntu 14.04

This simple tutorial shows how to install latest Komodo edit on Ubuntu 13.04 Raring, 12.10 Quantal, 12.04 Precise via ppa repository.
komodo ubuntu
Komodo Edit, based on the award-winning Komodo IDE, offers sophisticated support for all major scripting languages, including in-depth autocomplete and calltips, multi-language file support, syntax coloring and syntax checking, Vi emulation, Emacs key bindings. It provides dynamic language expertise for Perl, PHP, Python, Ruby, and Tcl, plus JavaScript, CSS, HTML, and XML, and template languages like RHTML, Template-Toolkit, HTML-Smarty and Django.

Install Komodo Edit

A PPA repository has been created for Ubuntu users. So far it supports Ubuntu 13.04, 12.04 and 12.10.
To add the repository, press Ctrl+Alt+T on your keyboard to open terminal. When it opens, run below commands:
sudo add-apt-repository ppa:mystic-mirage/komodo-edit
After that, update your package lists and install this tool via command below:
sudo apt-get update; sudo apt-get install komodo-edit
Once installed, open it by running komodo command. 

Enable SSH in Ubuntu 14.04 Trusty Tahr

his simple tutorial is going to show you how to enable Secure Shell (SSH) service in Ubuntu 14.04 Trusty Tahr.
Secure Shell (SSH) is a cryptographic network protocol for secure data communication, remote command-line login, remote command execution, and other secure network services between two networked computers.
SSH is not enabled by default in Ubuntu, but you can easily enable this service viaOpenSSH, a free version of the SSH connectivity tools developed by the OpenBSD Project.
To do so, run the command below in terminal:
sudo apt-get install openssh-server
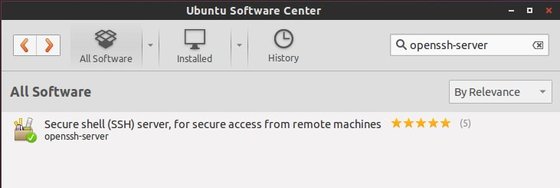
Or install the openssh-server package via Ubuntu Software Center if you’re on Desktop edition:
install ssh server Ubuntu 14.04
Once installed, you can change the port, disable root login and do other changes by editing the config file:
sudo gedit /etc/ssh/sshd_config
Finally restart the ssh server to take place:
sudo /etc/init.d/ssh restart

יום רביעי, 9 באפריל 2014

OpenSSL Security Advisory - TLS heartbeat read overrun CVE-2014-0160

OpenSSL Security Advisory [07 Apr 2014]

========================================

TLS heartbeat read overrun (CVE-2014-0160)
==========================================

A missing bounds check in the handling of the TLS heartbeat extension can be
used to reveal up to 64k of memory to a connected client or server.

Only 1.0.1 and 1.0.2-beta releases of OpenSSL are affected including
1.0.1f and 1.0.2-beta1.

Thanks for Neel Mehta of Google Security for discovering this bug and to
Adam Langley <agl@chromium.org> and Bodo Moeller <bmoeller@acm.org> for
preparing the fix.

Affected users should upgrade to OpenSSL 1.0.1g. Users unable to immediately
upgrade can alternatively recompile OpenSSL with -DOPENSSL_NO_HEARTBEATS.

1.0.2 will be fixed in 1.0.2-beta2.

More information:
Check you OpenSSL Version (CentOS):
  • #openssl version
  • #openssl version -a
  • #rpm -q openssl
  • #yum update openssl
  • #rpm -q --changelog openssl-1.0.1e | grep -B 1 CVE-2014-0160
How can I check if my HTTPS site is still vulnerable?
OpenSSL 1.0.1g has been released to fix "A missing bounds check in the handling of the TLS heartbeat extension can be used to reveal up to 64kB of memory to a connected client or server. This issue did not affect versions of OpenSSL prior to 1.0.1."[1] known as the Heartbleed Bug [3]. /*** update by Johannes Ullrich ...: ***/ Ubuntu released a patch for affected versions: http://people.canonical.com/~ubuntu-security/cve/2014/CVE-2014-0160.html Ubuntu also updated OpenSSH. CentOS/RHEL has a patch available. https://rhn.redhat.com/errata/RHSA-2014-0376.html For CentOS, the OpenSSL version did not change. Instead, only the compile time changed. To test if you are running the right version, look at the second line of the "openssl version -a" output: Fixed version: $ openssl version -a | head -2 OpenSSL 1.0.1e-fips 11 Feb 2013 built on: Tue Apr 8 02:39:29 UTC 2014 Old version: OpenSSL 1.0.1e-fips 11 Feb 2013 built on: Wed Jan 8 18:40:59 UTC 2014 You probably want to make sure you at least restart affected daemons that load OpenSSL, or just reboot the system. If you are concerend that the vulnerability was already used to read memory from your systems, you at least should change your SSL keys. --- The quickest way to figure out which version of OpenSSL you are using is: openssl version -a But not that some software may be compiled statically with openssl. For a vulnerable system, this will return a version of 1.0.1f (or anything but 'g'). Also there will be no complier flag-DOPENSL_NO_HEARTBEATS.

יום שלישי, 25 במרץ 2014

Hide the Apache Web Server Version number with ServerSignature and ServerTokens directives

You can easily hide Apche (httpd) version number and other information. There are two config directives that controls Apache version. The ServerSignature directive adds a line containing the Apache HTTP Server server version and the ServerName to any server-generated documents, such as error messages sent back to clients. ServerSignature is set to on by default. The ServerTokens directive controls whether Server response header field which is sent back to clients includes a description of the generic OS-type of the server as well as information about compiled-in modules. By setting this to Prod you only displays back Apache as server name and no version number displayed back.
Open your httpd.conf file using text editor such as vi:
vi httpd.conf
Append/modify config directive as follows:
ServerSignature Off
ServerTokens Prod
Save and close the file. Restart Apache web server:
# /etc/init.d/httpd restart

Thanks to nixCraft from cyberciti

יום ראשון, 23 במרץ 2014

CentOS policy routing

Over the years working in LAN networking there are several situations that dictate a host/server have multiple IP addresses on the same or different, physical or logical, devices.  For instance, connecting to a private management-only network/vlan, offering connectivity to a inside network on a private NIC, etc etc.


This scenario often causes two somewhat annoying behaviours:

1) the return traffic often is sourced from the “primary” IP address of the host/server, most often the one that is on the subnet associated with the default gateway
2) a surprising number of alleged “network administrators” seem to think having multiple gateways (one for each IP address of course )  is a good idea.  Well, over the years I have come across this situation and, in every case, this has obviously  NEVER WORKED.  

Situation #2 can only be fixed by education and occasionally the dismissal of the “IT” person for someone more qualified.  As for situation #1, RedHat/CentOS supports viaiproute2 the ability to make traffic rules, ensuring that IP traffic is sourced by a particular IP in cases you can define.  Great!  Multiple NIC or logical interface routing on Linux is possible! (and yes, it involves having multiple gateways, but not stupidly and blindly adding them in the routing table….)
It is very simple to implement and involves the steps below.  As an example, lets assume we created a management VLAN (VLAN4) and want to add an logical interface on a server in that VLAN to access it internally.  We will be using 10.0.10.0/28 as an inside network.

Step 1: Create a VLAN interface

This creates the necessary interface on VLAN4 from primary physical interface eth0:
vi /etc/sysconfig/network-scripts/ifcfg-eth0.4
DEVICE=eth0.4
BOOTPROTO=static
ONBOOT=yes
TYPE=Ethernet
IPV6INIT=no
IPADDR=10.0.10.2
NETMASK=255.255.255.240
NETWORK=10.0.10.0
VLAN=yes

Step 2: Create a iproute2 table for that management network

Edit /etc/iproute2/rt_tables to add a new entry and give it a arbitrary (unused ;) ) name:
vi /etc/iproute2/rt_tables
#
# reserved values
#
255     local
254     main
253     default
0       unspec
#
# local
#
#1      inr.ruhep
200     MGMT
Note that between 200 and MGMT is a tab character.

Step 3: Create a default route for that network

vi /etc/sysconfig/network-scripts/route-eth0.4
default table MGMT via 10.0.10.1
this creates a default route for the MGMT/10.0.10.0/28 network to 10.0.10.1 which is your inside routing intelligence.

Step 4: Create routing rule for 10.0.10.2

To ensure that traffic received on 10.0.10.2 is utilizing the MGMT network only as a source address, a rule must be defined to enable this:
vi /etc/sysconfig/network-scripts/rule-eth0.4
from 10.0.10.2 table MGMT

and thats it!  restart your network:
/etc/rc.d/init.d/network restart

Using iproute2 commands, we can check that what we did works (as well as using wireshark ;) )

[root@server network-scripts]# ip rule show
0:      from all lookup local
32765:  from 10.0.10.2 lookup MGMT
32766:  from all lookup main
32767:  from all lookup default
 
[root@server network-scripts]# ip route show
10.0.10.0/28 dev eth0.4  proto kernel  scope link  src 10.0.10.2
66.1.1.0/25 dev eth0  proto kernel  scope link  src 66.1.1.12
169.254.0.0/16 dev eth0  scope link  metric 1002
169.254.0.0/16 dev eth0.4  scope link  metric 1006
default via 66.1.1.125 dev eth0

Note: this also would work with a second physical interface, for instance to utilize a second NIC card instead of a VLAN logical interface, substitute all use of eth0.4 for eth1.
Thanks to: ChrisConn